Homemade Butterfinger Caramel Apples in Minutes: Your Easy Guide to a Crunchy, Chewy Delight
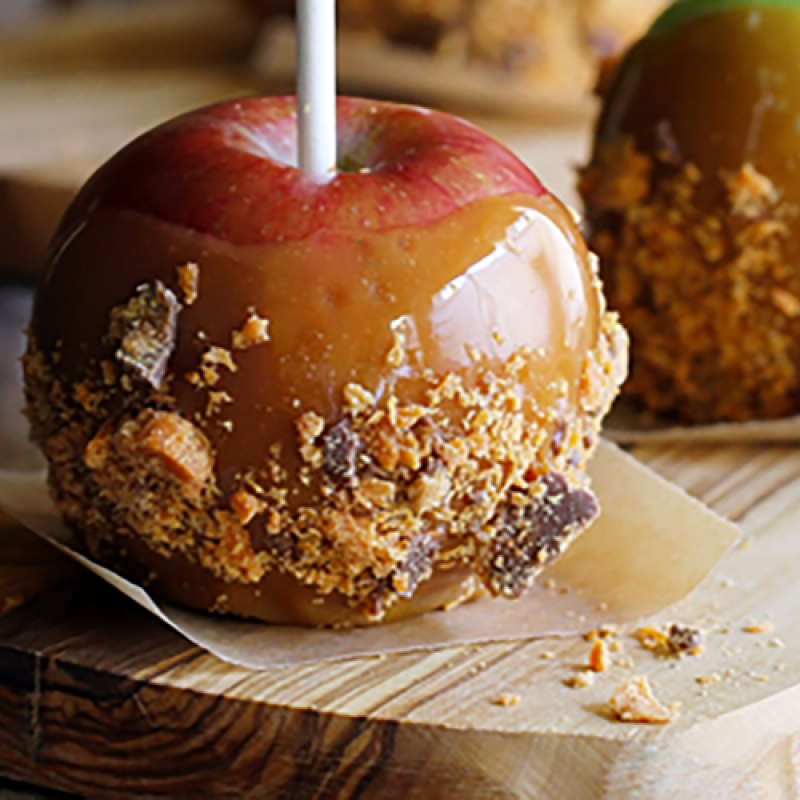
Imagine biting into a crisp, tart apple, enveloped in a smooth, buttery caramel, and studded with irresistible chunks of crunchy Butterfinger candy. Sounds like a dream, right? What if we told you that crafting these gourmet gourmet Butterfinger caramel apples at home is not only achievable but surprisingly quick and easy? Forget store-bought versions; homemade delivers unparalleled freshness, flavor, and a satisfying sense of accomplishment. This guide will walk you through creating perfect butterfinger caramel apples in what feels like minutes, transforming simple ingredients into an extraordinary treat that will delight everyone, from family to party guests.
Caramel apples evoke nostalgia and are a quintessential fall and Halloween indulgence. By adding the iconic, flaky, peanut-buttery crunch of Butterfinger, you elevate a classic to a whole new level of deliciousness. Whether you're preparing for a spooky sweet treat for Halloween, a festive fall gathering, or simply craving a unique dessert, these homemade delights are guaranteed to be a hit. Let's dive into how you can make these show-stopping treats with minimal effort and maximum impact.
Why Homemade Butterfinger Caramel Apples Trump Store-Bought
There's a special kind of magic that comes with homemade treats, and homemade butterfinger caramel apples are no exception. While store shelves might offer pre-made options, nothing beats the freshness and customizable charm of making them yourself. Here’s why going DIY is always the better choice:
- Unmatched Freshness: You control the quality of your ingredients, from the crispness of the apple to the melt-in-your-mouth caramel. Apples retain their juicy crunch, and the caramel is perfectly soft and pliable, unlike often hardened commercial versions.
- Customization is King: Love extra Butterfinger? Go for it! Prefer a slightly thicker caramel coat? You're in charge. You can even experiment with different apple varieties or add a drizzle of chocolate for an extra layer of decadence.
- Cost-Effective: Making a batch of six delicious butterfinger caramel apples often costs less than buying just a couple of gourmet ones from a specialty store.
- Fun for All Ages: This recipe is simple enough for even beginner cooks and is a fantastic activity to do with kids, especially around holidays like Halloween. The dipping and decorating process is genuinely enjoyable!
- Impressive Presentation: Hand-dipped and decorated apples have a rustic, artisanal appeal that store-bought ones often lack. They make fantastic gifts or show-stopping centerpieces for any autumn gathering.
Ready to experience the joy of creating your own gourmet delights? Let's get started on the ingredients you'll need.
Gather Your Ingredients: The Essentials for Sweet Success
The beauty of this recipe for butterfinger caramel apples lies in its simplicity. With just a few key components, you're on your way to a truly exceptional dessert.
What You'll Need:
- 6 Tart Apples: Granny Smith is the classic choice due to its firm flesh and tartness, which beautifully cuts through the sweetness of the caramel and candy. Honeycrisp or Fuji are also excellent options if you prefer a slightly sweeter apple with a good crunch. Ensure they are thoroughly washed, dried, and have their stems removed.
- 1 (14-ounce) Package Soft Caramels: Kraft brand caramels are widely available and work perfectly. Look for the individually wrapped squares.
- 2 Tablespoons Water: This helps thin the caramel slightly for a smoother, more even coating.
- 2 (2.1-ounce) NESTLÉ® BUTTERFINGER® Candy Bars: These are the stars of the show! Make sure they are fresh for that signature flaky crunch.
- 6 Wooden Popsicle Sticks: These can be found in most craft stores, cake decorating sections, or even larger grocery stores. Ensure they are sturdy enough to hold a caramel-dipped apple.
Pro Tip for Apples: Choosing firm, unblemished apples is crucial. Soft spots can lead to breakage during dipping. Washing and drying them thoroughly helps the caramel adhere better. Any residual moisture can cause the caramel to slide off.
Step-by-Step Guide: Crafting Your Perfect Butterfinger Caramel Apples
Making homemade butterfinger caramel apples is a straightforward process, broken down into a few easy steps. Follow these instructions carefully for the best results!
Preparation is Key:
- Prepare Your Workspace: Line a tray or baking sheet with waxed paper. This non-stick surface is essential for the apples to set without sticking.
- Insert Sticks: Carefully insert one wooden popsicle stick into the stem end of each washed and dried apple. Push it firmly about halfway into the apple to ensure it’s secure and can support the apple once it’s coated with caramel and candy.
- Chop the Butterfinger: Unwrap your Butterfinger candy bars and chop them into small, irregular pieces. A food processor can make quick work of this, but a sharp knife and a cutting board work just as well. You want a mix of fine crumbs and slightly larger chunks for varying textures. Spread the chopped candy on a shallow plate or in a wide bowl, ready for rolling.
Melting the Caramel:
- Combine Ingredients: Unwrap all the caramel squares and place them in a large, microwave-safe bowl. Add the 2 tablespoons of water. Using a larger bowl prevents overflow and provides ample space for dipping.
- Microwave and Stir: Microwave the caramels and water on HIGH (100%) power for 2 minutes. After this initial burst, stir the mixture well. The caramels might not be completely melted yet, but stirring helps distribute the heat.
- Achieve Smooth Consistency: Continue to microwave at additional 10- to 20-second intervals, stirring vigorously after each interval, until the caramel is completely smooth and liquid. Be patient, as consistency is key here. Overheating can cause the caramel to burn or become too hard once cooled. If your caramel becomes too firm during the dipping process, simply return it to the microwave for 20-30 seconds until it regains a dippable consistency.
Dipping and Decorating:
- Dip the Apples: Holding an apple by its stick, carefully dip it into the melted caramel. Rotate the apple to ensure it's evenly coated. The goal is to cover about three-quarters of the apple.
- Scrape Excess Caramel: Gently lift the apple from the caramel. Lightly scrape any excess caramel from the bottom of the apple against the edge of the bowl. This prevents a large "foot" of caramel from forming at the base and helps the apple sit flat.
- Roll in Butterfinger: Working quickly while the caramel is still warm and tacky, immediately roll the bottom half (or as much as you prefer) of the caramel-dipped apple in the chopped Butterfinger pieces. Press gently to help the candy adhere.
- Set and Chill: Place the decorated apple onto your prepared waxed paper-lined tray. Repeat with the remaining apples.
Setting and Storage:
- Refrigerate: Once all apples are dipped and decorated, transfer the tray to the refrigerator. Chill for at least 45 minutes, or until the caramel is completely set and firm to the touch. This crucial step prevents the caramel from oozing.
- Store: For optimal freshness, store your butterfinger caramel apples in an airtight container in the refrigerator.
- Serve Fresh: While they can be stored for a few days, these apples are truly best if served the same day they are prepared. The apple is crispest, and the caramel is at its ideal texture.
Pro Tips for the Ultimate Butterfinger Caramel Apple Experience
Elevate your homemade butterfinger caramel apples from great to absolutely extraordinary with these expert tips and insights:
- Temperature Matters: Ensure your apples are at room temperature before dipping. Cold apples can cause the caramel to seize and clump unevenly.
- Caramel Consistency: If your caramel seems too thick after melting, a tiny splash more water (1/2 teaspoon at a time) can help thin it. If it's too thin, it might slide off the apples. Patience with microwave intervals and stirring is key to getting it just right.
- Double the Crunch: Don't limit yourself to just Butterfinger! While the main keyword focuses on it, feel free to experiment. You could also try chopped peanuts, mini chocolate chips, or even a sprinkle of sea salt on a few of your apples for a salty-sweet twist. The reference mentioned Nestlé Crunch as an alternative, proving versatility.
- Safe Handling of Hot Caramel: Caramel gets very hot! Use oven mitts or thick kitchen towels when handling the bowl from the microwave and be careful when dipping.
- Pre-Crushing Butterfinger: If you're using a knife, place the candy bars in a sturdy zip-top bag and gently crush them with a rolling pin before finely chopping. This prevents the candy from flying everywhere.
- Serving Suggestion: For an extra decadent treat, let the apples sit out for 10-15 minutes before serving to slightly soften the caramel. Slice them into wedges for easier eating, especially for younger children.
- Gifting Idea: Wrap individual butterfinger caramel apples in clear cellophane bags tied with festive ribbons for charming homemade gifts.
Conclusion: Your New Favorite Fall Treat
There you have it – a comprehensive guide to crafting delightful homemade butterfinger caramel apples that are surprisingly easy to make and incredibly satisfying to eat. From the crisp snap of the apple to the chewy, buttery caramel and the unmistakable flaky crunch of Butterfinger, every bite is a symphony of textures and flavors. This recipe proves that gourmet treats don't require hours in the kitchen, making it perfect for busy individuals and families alike.
So, the next time you're looking for a special dessert, a unique party favor, or just a sweet escape, gather your ingredients and prepare to impress. These delightful creations are more than just a dessert; they're an experience, ready to bring smiles and satisfy cravings in minutes. Enjoy the process, and most importantly, savor every delicious bite of your masterpiece!
